- Home
- Accessories/Parts
- Feeder Heater Intructions
FTC Disclosure: If you make a purchase via a link on this site, We may receive a small commission on the transaction - at no added cost to you. Thank you!
Hummingbird Feeder Heater Instructions
The Hummingbird Feeder Heater Instructions:
The hummingbird feeder heater will fit hummingbird feeders with a ring-type perch and a bottom without protrusions so the product can be directly in contact with the bottom of the feeder. This creates a warm pocket of air which heats the bottom of the feeder. Do don't use if, when attached to feeder, the bulb is in contact with the feeder. There must be clearance between the bulb and any surface on the feeder.
Initial Adjustment:
The Heater attaches to the hummingbird feeder with three hooks that engage the ring perch. These hooks are attached to shock cord which is adjusted by squeezing the cord lock and moving the cord lock along the shock cord.
Do not install lamp holder.
- For tray type feeders remove the hanging hook, for bottle type feeders remove bottle.
- Turn the feeder over and place the Heater on top of the feeder.
- Connect the hooks to the ring perch and use the cord lock to adjust the tension of the shock cords.
- Adjust the tension on each hook by removing slack or tension as needed until all three hooks have about the same tension and are spaced evenly. Once properly adjusted this step is not required every time the feeder is filled.
See Fig. 1.
Tip: It's best to have just enough tension to hold the Heater against the bottom of the feeder.
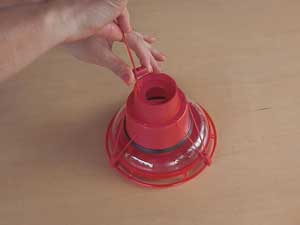 Figure 1
Filling Tray Type Hummingbird Feeders
- With the lamp holder removed, place the Heater upright on a flat surface, place the tray feeder on top of the Heater.
- Fill the feeder. See Fig. 2.
- Replace the feeder top.
- Now, holding the feeder down against the Heater with one hand, attach the hooks to the ring perch with the other hand. See Fig. 3.
- Adjust for even tension and spacing between hooks.
- Attach the ant moat cover. See Fig. 4.
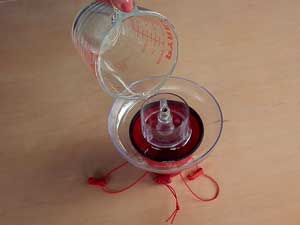 Figure 2
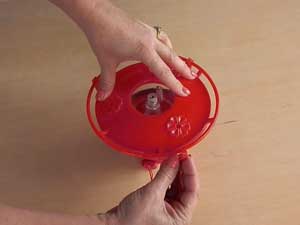 Figure 3
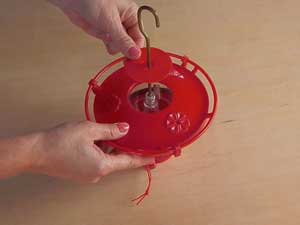 Figure 4
Filling Bottle Type Hummingbird Feeders
- With the lamp holder removed, place the Heater on a flat surface, place the feeder bottom on top of the Heater
- Now, holding the feeder down against the Heater with one hand, attach the hooks to the ring perch with the other hand. See Fig. 5.
- Adjust for even tension and spacing between hooks.
- Fill the bottle, screw the base with the Heater attached to the filled bottle. See Fig. 6.
 Figure 5
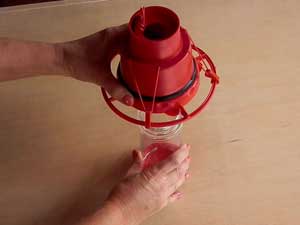 Figure 6
Hang Your Hummingbird Feeder
- Hang feeder with the Heater hummingbird feeder heater attached normally.
- Remove packing material from lamp holder.
- Be sure the lamp holder is not plugged into power.
- Squeeze the two metal tabs on the lamp holder together and insert the lamp holder into the round hole in the base of the Heater until the metal tabs snap in place. See Fig 7.
- Release the metal tabs and check that the lamp holder is firmly attached into the heater.
- Plug the lamp holder cord into a GFCI outlet. (See safety instructions.)
- Verify that the bulb is working.
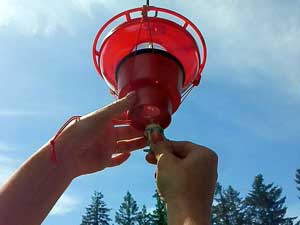 Figure 7
Removing Feeder for Filling
- Unplug lamp holder cord
- squeeze metal tabs on lamp holder together then remove from Hummer Hearth.
- Follow filling instructions in reverse order to prepare for refilling.
Tips for Use
- The Hummer Hearth is supplied with a 7-watt candelabra C7 bulb as a heat source.
- The key is to heat the feed gently without overheating. Generally, this will keep a small feeder thawed to about 15 degrees F.
- Feeder size, shape, and wind conditions can affect this greatly.
- A 15-watt candelabra bulb (supplied with the 15 watt model) can be used which will keep smaller feeders thawed to about 5 degrees F.
Congratulations!
You now have a feeder for all seasons!
If you are one of the lucky ones who have "Winter Hummingbirds", we would love to see your post on our "Winter Hummingbirds Map"
Post you sighting here.
Find Us Here!
|
|
|
|
|
|
|
|
|
|
|
|

Stay in Touch
with the Latest!
Subscribe to the
"Hummer" Newsletter.
Have A Great
Hummingbird Story!
We Would Love
To Hear it!
FTC Disclosure: If you make a purchase via a link on this site, We may receive a small commission on the transaction - at no added cost to you. Thank you!
What's New
-
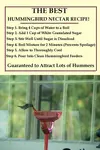
Hummingbird Nectar Recipe:4:1 Sugar Water Guide
Apr 30, 26 10:03 AM
 Printable guide to the hummingbird nectar recipe: 4 cups water + 1 cup sugar. Learn filling and cleaning steps so your feeder stays fresh every 3–5 days.
 -
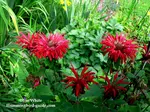
Flowers that Attract Hummingbirds. The Best Have High Nectar.
Mar 26, 26 11:21 AM
 The best flowers that attract hummingbirds are high in nectar including shrubs, perennials, trees and annuals that also attract hummingbirds.